Building a Roaming Photo Booth out of Cardboard
Carnival in Germany is a time of too much candy, questionable music choices, and everyone dressing up in unique costumes. This year, I decided to take my costume to the next level by building a DIY iPad photo booth roamer made out of cardboard.
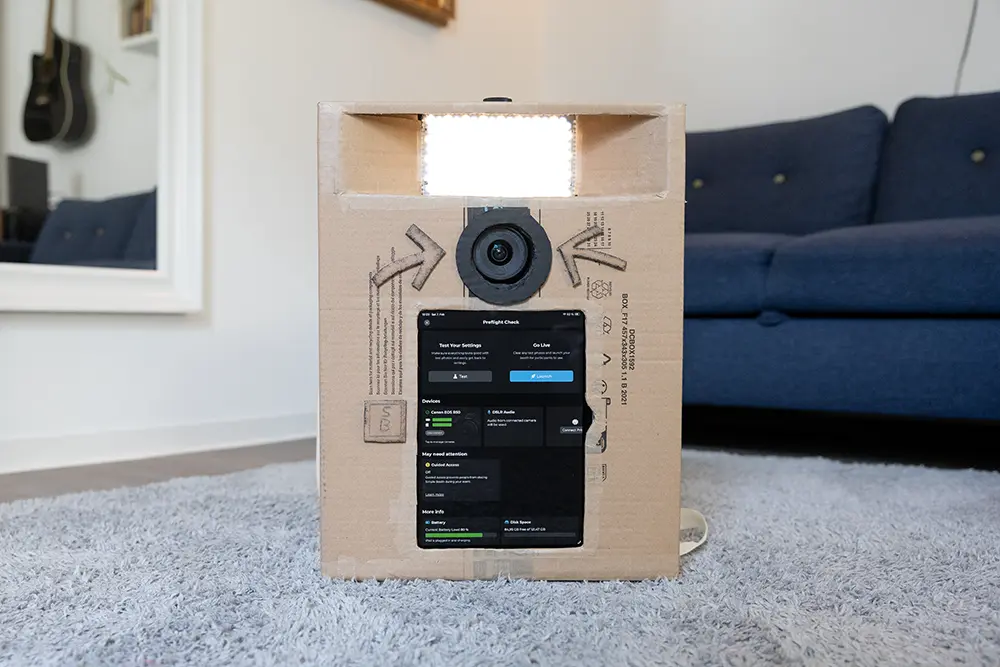
Hardware Setup
My goal was to build a mobile photobooth that could be worn like you’d wear a backpack on your chest. To keep things easy to operate at events, the entire setup needed to be lightweight and powered by a single power source, eliminating the need to swap batteries.
For my setup, I wanted to integrate an external camera for better low-light performance. However, if you want to keep it simple, all you need is an iPad running a photo booth app and an external LED light, and you’re good to go.

Here is an overview of every item I used:
- Aputure F7 LED light
- Canon EOS R50 + Dummy battery
- SmallRig VB99 SE mini V Mount Battery
- iPad Air M3 running the Simple Booth HALO app
- USB-C Hub
- Angled USB-C cable to connect the hub to the iPad
- Short USB-C cable to power the USB hub
- 2x USB-A to USB-C cables
The SmallRig battery was perfect for my setup, since it allowed me to power the iPad, camera, and LED light from a single power source.
Tools Used
One of the best things about working with cardboard is its accessibility and its forgiving nature. You don’t need any fancy equipment—just a few everyday tools:
- Box cutter
- Hot glue gun
- Ruler
- Pen

Assembling the DIY Roamer
I started by searching for a cardboard box spacious enough to fit the iPad, camera, and LED light. I spent some time arranging the components on top of different boxes and testing layouts until I finally found one that was just the right size. Although it wasn’t as sturdy as I’d like, its dimensions were ideal for the project.

First, I measured and cut out an opening for the iPad screen. To keep the iPad in place, I glued a frame made from scrap cardboard around the edges.
Next, I mounted the camera and LED light. I created small, shelf-like enclosures inside the box, each designed to hold its device snugly. Both the camera and the light are fixed using a 1/4” screw, which keeps them in place even when the roamer is in motion.

Securing the iPad proved challenging, especially since it needed to withstand taps and swipes during use. After some experimentation, I found a second cardboard box in my stash that fit perfectly as a reinforcement, preventing the iPad from slipping out.

To accommodate the necessary wiring, I added cutouts for the various cables and built dedicated pockets for the V-Mount battery and USB-C hub.
Finally, I attached straps to the box, allowing me to carry the photo booth Roamer throughout the event. The result was a surprisingly robust and functional setup, ready to be worn and capture memories.

Software
The brain that enables the photo booth experience is the Simple Booth HALO iPad app. Simple Booth offers a range of features that make running a photo booth, well, simple. You can create custom designs for your photos, and all images are automatically synced to an online gallery. Sharing is easy and instant, thanks to built-in support for QR codes, AirDrop, and WhatsApp.
To be fully transparent, I’ve been working as a freelance software engineer at Simple Booth to enable camera control in the HALO app. I’ve been using the Simple Booth app myself on various occasions, like weddings. Hence, events like these are a great opportunity to test the camera control integration in the real world.
As for the designs, I created a single-frame and a dual-frame version, and made heavy use of the new AI asset generation feature, which was a huge time-saver for quickly creating decorations like balloons, garlands, and sprinkles for the background.

Learnings and Future Improvements
In the end, the DIY roamer booth was a huge success at the event, capturing memories throughout the evening and sparking plenty of fun interactions.
If I were to start over from scratch, here are a few improvements I’d make:
- Start with a sturdier box with no seam in the front
- Add a way to control the light intensity of the LED light
- Improve ventilation
- Upgrade to nicer straps
Working on the cardboard version really sparked my interest in creating a more sturdy version. However, considering I started this project 5 days before the carnival, I really liked how it turned out.