How to modify a SmallRig 3061 Plate to fit on Sachtler Fluidheads
Recently, I was looking for an adapter plate from Arca Swiss to the Sachtlers Sideload S system (Manfrotto 501) that would allow me to quickly mount my Canon R7, which lives in a SmallRig 4003B cage, to a Sachtler Ace Fluidhead.
When I came across the SmallRig 3061 quick-release plate, its external construction suggested it would be compatible with the Sachtler plate, but reviews and comments said otherwise.
The SmallRig 3061 plate is designed for DJI’s RS2, RS3, or RS4 gimbals and provides a toothed rack on the bottom, which allows fine adjustments while balancing the camera on a gimbal. However, if you attempt to mount this plate on a Sachtler Fluidhead, its toothed rack interferes with the locking mechanism of the Sachtler head.
Luckily, with just a few simple modifications and 3D-printed inserts, you can transform the SmallRig 3061 plate into the perfect Arca Swiss to Sideload S (Manfrotto 501) adapter plate.
Step 1: Removing the toothed rack
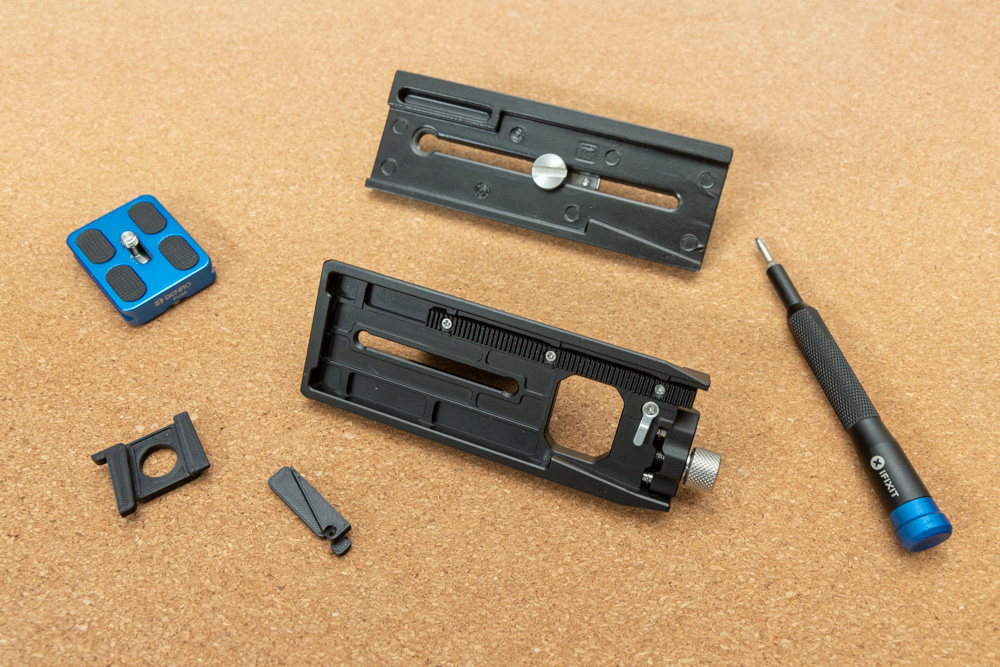
The toothed rack is held in place by three screws that are easy to unscrew. Afterward, the toothed rack can be removed.

Step 2: Adding 3D-printed inserts
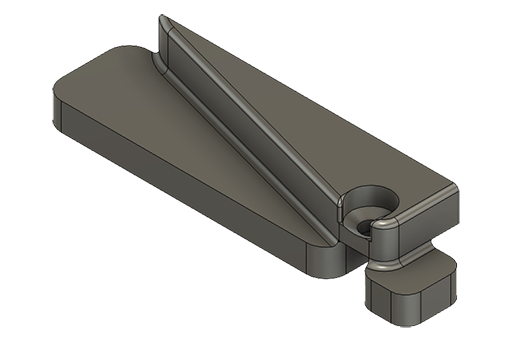
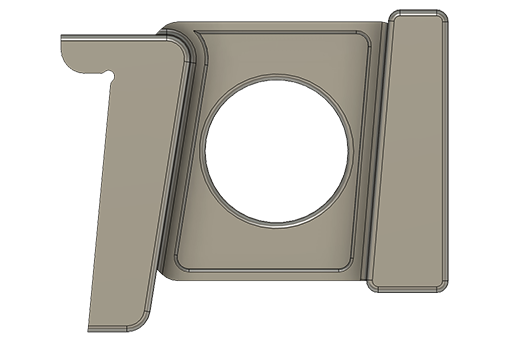
With the toothed rack removed, the SmallRig 3061 plate should slide onto a Sachtler head easily, but no safety hooks prevent the plate from sliding off the head. Therefore, I designed 3D-printable inserts that engage with the locking mechanism so the plate does not slide off without pressing the safety release.
The first insert can be attached using one of the screws previously holding the toothed rack into place.

The second insert has to be pressed into the plate. Since the tolerances are tight, there is no need to glue it into place, as friction alone prevents this part from falling out.

Step 3: Filing a gap into the front of the plate
To allow the plate to slide onto the Sachtler head, you have to create a small cutout in the front of the plate. To do so, I clamped down the plate in a vice and used a file to cut out the gap.

The best part of this modification is that it’s non-permanent (apart from the small cutout). While you could glue the 3D-printed inserts to the plate to prevent them from ever coming loose, it shouldn’t be necessary since friction holds them into place just fine. Therefore, if you ever want to use the SmallRig 3061 plate on a DJI gimbal, you can easily remove the inserts and reattach the toothed rack.
Project Files
If you want to modify a SmallRig 3061 plate as well, here are the Fusion 360 and stl files: